
Overview
This article provides instructions for completing your Yearly Rating Setup. The Yearly Rating Setup process allows you to plan for the upcoming school year and establish rating window timeframes. During this process, you will answer a series of questions and configure your rating windows.
Users in the role of Program Admin have the ability to complete Yearly Rating Setup.
📌Note: See the Resource section of this article for a short video that walks through the steps of Yearly Rating Setup.
Access Yearly Rating Setup
- Click the Gear icon (top right) > Settings.
-
Unable to Locate the Gear Icon? On smaller screens or at certain zoom levels, the gear icon may not appear in the upper-right corner of the application. To access Settings, click the hamburger menu (☰) in the upper-left corner and select Settings from the menu.
-
-
Select Yearly Rating Setup
-
Confirm the correct School Year is selected (e.g., 2026–2027). See School Year in the DESSA x Move This World System.
-
Click Set Up.
-
Select the number of Rating Windows for the year.
-
Click Continue.
Image 1
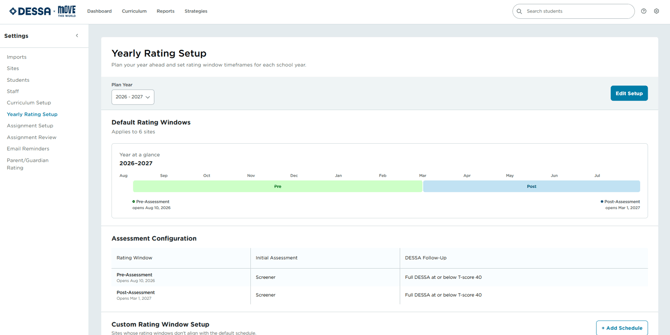
Set Up the Pre-Assessment Rating Window
- Select a Start Date.
- Choose the starting Pre-Assessment form:
- DESSA Screener (DESSA 2-mini / DESSA HSE-mini), or
- DESSA Full (DESSA 2, DESSA HSE)
- Set the Threshold Score (default: 40). See Conditional Assignment & T-Score.
- Choose what happens for students in the Need for Instruction range:
- Continue with the Full DESSA, or
- Start each window with a new Screener
Set Up Additional Rating Windows
- Complete the Mid or Post-Assessment window via the setup wizard. (Skip if using Annual Rating Window).
- Repeat for any remaining windows (up to 5 total).
- Click the ^ icon to expand and review all settings.
- Choose Who Controls Student Self-Assessment Access If your program uses Student Self-Report.
-
- Automatic – Opens for students at the start of each window; no action needed.
- Site Leader Controlled – Site leaders decide when their students can access it.
- Click Save.
Create Custom Rating Schedules (Optional)
- Click + Add Custom Schedule.
- Select the sites needing a different schedule (Image 2).
- Click Continue, then name the schedule (e.g., "Middle Schools").
- Select the number of rating windows and complete the setup wizard.
- Click Save. The schedule appears under Custom Rating Window Setup.
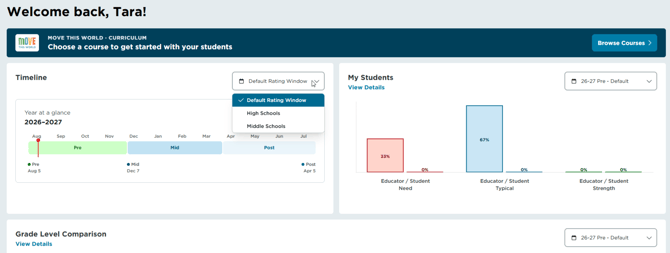
📌Note: If you have configured custom schedules in the Yearly Rating Setup, you can easily switch between each schedule on the Dashboard and within the Rating Window filter in Reports (Image 3).
Image 2
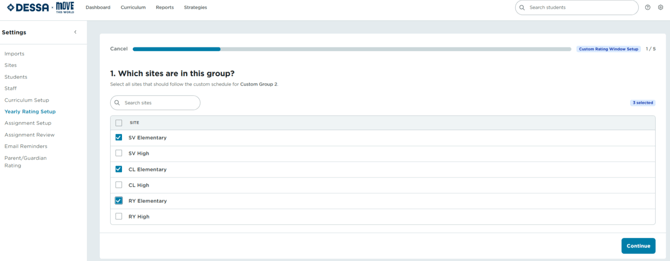
Image 3
Set Up Email Reminders
-
Review the Email Reminders article for guidance on configuring your reminder schedule.
Complete Assignment Setup (SIS-Managed Programs Only)
-
If your org rosters via SIS integration, go to Creating Assignment Rules to finish configuration.
Action Items
- Verify rating windows before the first window opens
- Confirm Email Reminders are set up
- Complete Assignment Setup (SIS-managed programs)
- Create custom schedules, if needed